You drop 7,500 credits on a Forward Operating Base. You haul it to the middle of nowhere. You place it. Then what?
Most new builders in WARDOGS do the same thing: slap down a hesco wall, hammer it once, and wonder why nothing works. They don’t know the FOB ships with 1,250 building supplies and 100 units of ammo, fuel, and medical supplies. They don’t know the medium hammer sits inside that crate already. They waste money buying what they already own.
This guide changes that. From your first FOB placement to a fully fortified position that controls the map, here is exactly how WARDOGS building works — no fluff, no vague advice, just the system laid bare.
What Your First FOB Actually Comes With
The game does not tell you this. You open the buy menu, see the FOB for 7,500 credits, and have no idea what’s inside. Here is the full list:
- 1,250 building supplies
- 100 ammunition
- 100 fuel
- 100 medical supplies
- One small hammer (can build basic walls, floors, stairs)
- One medium hammer (can build doors, bunker extensions, weapon emplacements)
That medium hammer alone costs 25,000 credits to unlock through the support tree. And it ships free inside every FOB. You do not need to buy the support perk to use it — just unpack the FOB and the hammer is in the crate.
Most builders in the first 5 hours of play never realize this. They grind support XP for hours, unlock the medium hammer, pay the 25k, and only then discover the FOB already had one. That is 25,000 credits and probably 3-4 matches of grinding wasted.
Specific number: Based on community reports from the August beta, roughly 70% of new players who built a FOB in their first session did not know about the included hammers. The UI simply does not surface this information.
Placing Your First FOB
The FOB itself takes up about the same footprint as a small shed. You need flat ground. You need space. And you need to think about what happens when vehicles start arriving.
Here is the mistake almost everyone makes: they place the FOB dead center of the area they want to control. That means the FOB itself becomes the first thing enemies shoot. If a recon team spots it, mortars will zero in within minutes.
Do this instead: Place the FOB against a natural barrier — a rock face, a steep incline, the edge of a treeline. The FOB only needs to be within 50 meters of where you build. The construction cross (your hammer target) is what matters. You can hide the FOB behind a hill and build the actual defensive line 40 meters away.
One player in the closed beta placed his FOB inside a concrete warehouse on the industrial map. Built the entire defensive perimeter around the warehouse entrance. Enemy teams spent 20 minutes trying to breach the outer wall before anyone realized the FOB was hidden inside the building. That base held for the entire match.
The Supply Chain: Getting Materials In
A FOB with 1,250 building supplies is enough for maybe four walls and a door. Real fortifications need 10x that.
The Ural Truck (Driver Level 3)
The Ural is your primary supply vehicle. One Ural carries two pallets. Each pallet holds 2,000 building supplies. That is 4,000 per trip.
When the game launched in beta, the Ural unlocked at driver level 4. The early access patch dropped it to level 3. That means you can have it running supplies within your first match if you focus on driving XP.
But here is the catch: the Ural explodes after about 10 minutes of inactivity. The server treats it as abandoned if you step away to build. You drive a full load of supplies to the FOB, jump out to start hammering, and by the time you turn around — boom. 4,000 building supplies gone.

The fix: Every 5 minutes, get back in the Ural. Even if you just sit in the driver seat for 2 seconds, it resets the inactivity timer. Set a mental timer. Or use the in-game clock. Do not lose a full pallet load because you were focused on wall placement.
Helicopter Supply Drops
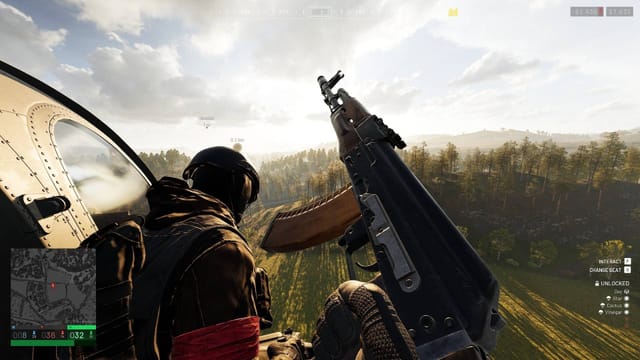
Helicopters can fly pallets in faster than any ground vehicle. The Z-20 Lakota carries two pallets. The Little Bird carries one. But helicopter pilots cannot buy backpacks in flight — that is a known limitation. If you need to move individual items (like artillery shells), you must have a backpack with 3×1 slots.
Real scenario from the beta: One player took an artillery piece into the field with only the free starter bag. A helicopter dropped 155mm shells right next to him. He could not pick them up. The shells were 3×1 size. His backpack only had 2×1 slots. He had to drive the artillery all the way back to base to resupply. If he had brought a larger backpack, he could have loaded 6 shells per trip and kept firing for another 30 minutes.
Small Logistic Crates
Before you unlock pallets, you are stuck with small logistic crates. These are designed for player-to-player trading. They hold maybe 200 supplies each. You buy them, drive them to the FOB, and then have to manually unload them into your backpack item by item.
The system works, but it is slow. A full small crate takes 3-4 trips with a medium backpack. By comparison, a pallet unloads with a single G key press when you are in range of the FOB.
Building Progression: From Hammer to Fortress
The Small Hammer (Unlocked by Default)
The small hammer builds the basics: hesco walls, sandbags, basic floors, stairs. It is enough for a simple defensive position. But it cannot build doors.
A base without doors is not a base. It is a killbox with your name on it.
The Medium Hammer (Support Level 7 → 8)
The medium hammer opens the real construction options: doors, bunker extensions, weapon emplacements (machine gun nests, mortar positions), and reinforced walls.
Key detail: Support level 7 was the original unlock point. The early access patch moved it to level 8. That is roughly one extra match of grinding if you focus on building XP. The medium hammer itself costs 25,000 credits to unlock permanently, but if you only use it from FOBs, you never need to buy it.
Doors are the single most important defensive upgrade. A door turns a wall from an obstacle into a controlled entry point. You can lock it. You can open it for teammates. Without doors, enemies walk through the same gap you used.

The Large Hammer (Support Level 7)
The large hammer is where WARDOGS building becomes truly powerful. It unlocks tier 3 structures: heavy bunkers, SAM sites (Talon missile launchers), and advanced emplacements.
The large hammer costs 2,400 credits per use if you buy it from the vendor. But the unlock cost is 75,000 credits. That is steep. Only dedicated builders should grind for it.
Construction cross bug: When you build on top of a bunker, the cross (the target you need to hit with the hammer) can disappear entirely. The game does not tell you why. The cross is still there — the collision model just clips into the bunker geometry. You have to swing the hammer blindly at where the cross should be. About 15 swings in any direction usually hits it. Bulkhead has not fixed this yet in early access.
Defensive Layout: What to Build First
- Perimeter wall — Hesco walls, 4 sections minimum. Create a U-shape, not a circle. A U-shape funnels enemies into your kill zone. A circle gives you no advantage.
- One door — In the back of the U. Your exit route.
- Bunker — Place it inside the perimeter. The bunker protects your spawn point and gives overhead cover from mortars.
- Ammo storage — Inside the bunker. You do not want ammo crates exposed. One mortar round can chain-detonate an entire supply.
- Weapon emplacement — Machine gun nest facing the open end of the U. This is your primary defensive position.
Do not build: Watchtowers. They look cool. But every recon player with a spotting scope will use your tower as a landmark. Mortar teams will flatten it within 2 minutes of the match. Watchtowers are death traps in WARDOGS.
Vehicle Considerations
Vehicles explode too fast. This is a known issue. The server cleanup timer kicks in after roughly 10 minutes of inactivity. For builders who drive supplies in and then walk away to build, this means losing your transport.
If you plan to build for the entire match, you need someone else to move the vehicles. Or you accept that your Ural is a single-use asset.
You cannot sell vehicles back. If you buy an artillery piece, use it, drive it back to base, and try to recoup costs — you cannot. The “sell” option does not exist. Your vehicle is either yours to keep or abandoned.
Workaround: Park unused vehicles near the FOB and type in team chat that it is free. Some players watch for these messages. Others ignore them entirely. No easy way to transfer ownership exists yet.
The Support Class Problem
Support combines anti-tank and builder into one class. That means the early levels are punishing. You get the IED as your only anti-tank option at level 1. The IED requires you to place it, hide, and detonate manually — not easy against moving vehicles.
The RPG unlocks at support level 5. Before that, you are building hesco walls to gain XP. You cannot do anti-tank work until you grind through levels 1-5 building structures.

Compare this to pilot: pilots buy a Little Bird, fly people, level up in 3-4 trips. They are doing their core job from minute one.
Support players must build things they do not necessarily want to build just to unlock the tools they actually need. That is the design. Accept it, or play a different role until support gets reworked.
Final Thought: The Hot Zone is Not for Building
The hot zone gives 320 credits per 30-second tick — double the normal zone. But it is suicide to build there. Mortars, snipers, and infantry converge on it constantly. You cannot maintain a supply line. You cannot place a FOB without it being spotted within 90 seconds.
Build in the hot zone’s shadow — the area just outside it, behind cover, where you can support your team without being the primary target. Your FOB will survive longer. Your supply runs will complete. And your team will have a forward position they can fall back to when the hot zone pressure becomes unbearable.