You know the basics. You spawn, you pick a bag, a gun, some armor. But if you are playing Support in WARDOGS, that default mental flowchart will waste your time and your team’s supplies. The Support class is two roles welded together — builder and anti-tank — and most players fumble the transition between them because they treat the unlock tree as a linear shopping list. It is not.
The game’s progression is tuned to force choices. A FOB now costs 7,500. The large hammer unlock runs 75,000. The RPG does not appear until Support level five. Every purchase decision you make across your first 10 matches compounds into either efficiency or a credit sink that leaves you hammering hesco walls with the basic tool at minute 40.
Here is how to build loadouts that skip the grind’s sharp edges.
Builder Loadouts: The Medium Hammer Is Already Free
The biggest trap in the builder kit is buying your own hammer. The FOB — the Forward Operating Base deployable — spawns with a medium hammer included. That medium hammer can build doors, walls, and most defensive structures. The basic hammer cannot build doors at all. So if you arrive at a construction site with only the default tool, you are useless for anything except slapping down the cheapest hesco barriers.
Loadout rule: Do not unlock the medium hammer at the vendor. Instead, always carry a FOB. That means you need 7,500 credits at match start. If you do not have that, do not play builder. Run a logistics run first, or spawn as driver and earn the cash. The FOB is your hammer delivery system.
Bag choice for builders starts counter-intuitively: pick a 2×1 medium bag, not the large one. The reason is not capacity — it is speed. You will spend most of your time inside the FOB radius, unpacking crates and building. The large backpack slows your movement and makes you an easier target when you have to leave the perimeter to grab more supplies. A medium bag holds enough building materials (supplies, ammo, fuel) for one major structure cycle. Resupply at the FOB itself after each cycle.
Weapon choice: a compact SMG or a pistol. You are not fighting at range. The PP-19 with the 50-round drum (unlocked at Support level 29, or after the patch at 29) is ideal — light, fast, and enough firepower to deter a lone infantryman. Do not bring a full rifle. The weight trade-off is not worth the two engagements you might win.
Armor: light vest and a helmet that stops one bullet. Full armor eats stamina and makes you overheat while sprinting between supply piles. Your survivability comes from staying behind cover and using the FOB’s built-in protection, not from face-tanking.
Anti-Tank Loadouts: The IED Trap and the RPG Rush
The Support class combines builder and anti-tank. At level one, your only anti-tank option is the IED. It is a planted explosive that requires enemies to drive over it. In practice, that almost never happens against competent drivers. The IED is not a weapon — it is a distraction that wastes your time and backpack space.
Loadout rule: Do not spec into anti-tank until you hit Support level five and unlock the RPG. To get there fast, you must farm XP by doing builder tasks. That means delivering supply crates, building hesco walls, and placing FOBs. The source material from the community’s early access feedback agrees: “you basically have to deliver supply crates and build hesco walls until you get to level five.” Accept that your first few matches are pure construction.
Once the RPG is available, your loadout shifts. The large backpack is now mandatory. A single rocket takes significant space — the patch increased its footprint. You need the large bag to carry at least two rockets and still have room for bandages and a grenade.
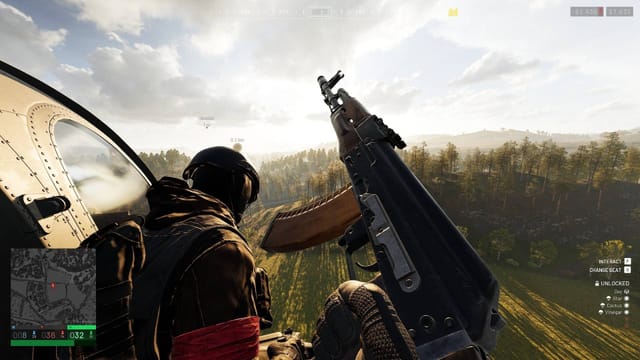
Weapon: a medium-range rifle, like the AK or the SKS. You will be engaging vehicles from 100–200 meters. The RPG has a long reload and limited ammo. Your rifle is your primary; the rocket is your finisher.
Armor: medium vest and a decent helmet. As an AT player, you will be pushing closer to the front line than a builder. You need to survive one rifle round.
Pro tip: If you are using artillery vehicles (the 122 mm or 155 mm), the hands-slot issue becomes critical. The game lacks a “hands” container. You cannot carry an artillery shell without a backpack slot large enough. The 3×1 bag is mandatory for artillery supply. That is the only scenario where the largest backpack is non-negotiable — and it is a reason many Support players ignore artillery altogether. Consider assigning artillery to a designated driver instead.
Economy: Spend on the FOB First
The progression changes between beta and early access are not cosmetic. The curve was flattened, then steepened again at levels 10–20, then relaxed. The result is that Support level six is reachable in one match if you focus on building. Level six unlocks the medium hammer vendor? Actually no — the FOB gives it free. But level six does unlock the Kodiak flatbed (driver level requirement, not Support). The key economy decisions:
- FOB (7,500): Always buy first. It comes with a medium hammer and 1,250 building supply. That is enough to erect a basic bunker and a couple of walls. Use it.
- Large hammer (75,000 unlock): This is a season-long goal, not a first-week purchase. Do not save for it early. The large hammer unlocks the ability to build Tier 3 structures (bunkers with roof access, SAM sites). But you do not need those until your team has a secure logistics chain anyway.
- Medium hammer (25,000 unlock): Pointless if you already use FOBs. Only buy it if you plan to build without deploying a FOB — which is rare.
The community’s advice from the “7 Things” video is blunt: the basic hammer cannot even build doors. Any Support player who does not bring a FOB is gimping their team. That is the single most important non-obvious rule.
The Hot Zone and Support Viability
Builders and anti-tank players rarely enter the hot zone. The hot zone gives 320 credits per tick (double the standard 160), but staying alive inside it is brutal. For Support, the opportunity cost is too high. A builder inside the hot zone is not building. An anti-tank player inside the hot zone is not protecting supply lines.
There is an argument that the hot zone’s payout should be tripled to make it worthwhile for Support, but currently the math does not support going there. You earn more credits per minute by running a supply Ural to a FOB than by dying repeatedly in the kill zone. Save the hot zone for assault and recon classes.
One Final Non-Obvious Tip
The vehicle cleanup timer is aggressive. If you park a Ural near a FOB and walk away to build, the vehicle may explode within minutes — even if you are still in the area. The only way to prevent it is to enter the vehicle periodically to reset its lifetime. That means you cannot treat your truck as a static container. Plan to move it every 3–4 minutes. Or accept that you will lose it and budget for a replacement.
This is the kind of detail that separates a builder who gets two supply runs per match from one who gets six. The game does not explain it. The event viewer logs might show a red exclamation mark pointing to a system driver conflict, but the vehicle cleanup is by design. Work around it.