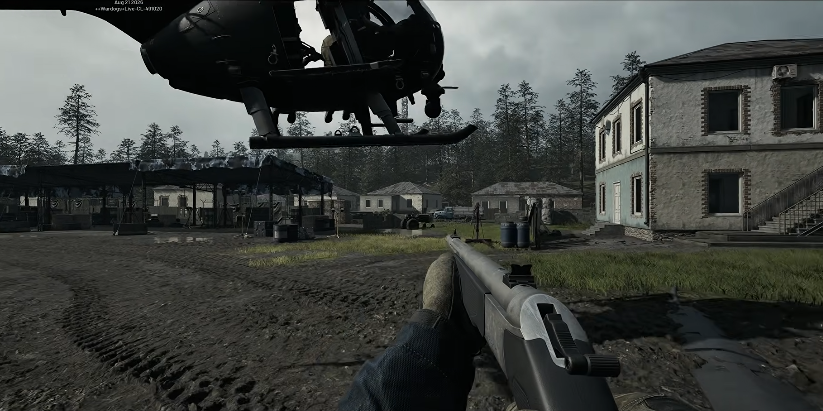
At first glance, Over The Top: WWI presents itself as a straightforward trench warfare shooter where spawning, grabbing a rifle, and charging forward seems to be the core gameplay loop. However, a deeper analysis of consistent winning teams reveals a different reality. The matches are not decided by players with the most precise aim or the fastest reflexes. Victory consistently goes to the teams that master battlefield positioning, apply strategic pressure, and control spawn mechanics. This guide distills the essential tactics that separate chaotic skirmishes from coordinated assaults, providing both newcomers and veterans with the knowledge to survive longer, contribute more effectively to their team, and avoid the critical mistakes that lead to entire matches being lost.
Frontline Combat Classes: Beyond the Rifle
Classes like the Rifleman, Stormtrooper, Specialist, and Armored soldier form the primary combat force of any team. Unlike Engineers or Officers, these roles are not burdened with the direct responsibilities of construction or leadership, granting players more autonomy to engage where they deem most effective. This freedom, however, comes with the crucial requirement of battlefield awareness. A common and costly error made by new players is congregating in an area already saturated with friendly troops. This creates a dense, stationary target that is vulnerable to concentrated grenade, artillery, and machine gun fire, ultimately hindering the team’s progress rather than helping it.
Mastering the Map for Strategic Impact
The tactical map is the most underutilized tool in a frontline soldier’s arsenal. Regular consultation is not optional; it is fundamental to success. Players must train themselves to scan for critical information: sectors where their team’s presence is thin or non-existent, objectives under imminent pressure, and the early formation of an enemy push. Identifying a struggling defensive point and either calling it out in team chat or personally reinforcing it can prevent a collapse that often occurs simply due to a lack of awareness. Proactive map reading transforms a reactive player into a strategic asset.
Adapting Positioning During Offensive and Defensive Actions
During an attack, players typically encounter one of two scenarios. The first involves overwhelming enemy fire that pins movement. Here, the priority is survival and suppression—staying in cover and waiting for an opening. The second scenario arises when enemy resistance is weak or disorganized. This is where positioning becomes paramount. If teammates are clumped together in a trench or shell crater, the correct move is not to join the pile. Instead, players should move to a flank or support a smaller, advancing group. A team slightly spread out is exponentially harder to eliminate with a single machine gun sweep or artillery strike. The goal is not to mimic a historically dispersed WWI assault formation to the letter, but to avoid presenting a single, dense target.
Weapon Mechanics and Overlooked Utilities
The weaponry in Over The Top: WWI behaves differently than in many fast-paced shooters, rewarding patience and understanding over twitch reactions. Rifles and machine guns possess effective ranges that many players underestimate. Distant targets, such as an enemy machine gun nest harassing the team, are often within engagement range and should be suppressed or eliminated. Conversely, mortars, while powerful, see their accuracy diminish significantly at longer distances, making heavy machine guns and cannons more reliable for consistent long-range area denial.
The Strategic Value of Risk and Unconventional Tools
A critical mindset shift is understanding that death is not a severe penalty. With fast respawns and no point loss for aggressive play, calculated risks are not just acceptable but often necessary to break a stalemate. Furthermore, players frequently overlook basic tools. Digging implements are not exclusive to Engineers; several combat classes can equip them. Even a shallow firing position scraped into the earth can provide the cover needed to survive a crucial exchange. Similarly, melee attacks, while risky, have a valid tactical niche. Against a distracted enemy or when an obstacle provides cover for approach, a sudden bayonet charge can be devastatingly effective, capturing the brutal, close-quarters essence of trench warfare.
The Engineer: Architect of the Defense
Engineers are the foundational element of any sustainable defensive line. A skilled Engineer can transform a vulnerable position into a formidable strongpoint. The cardinal rule of trench construction is simple yet frequently ignored: never dig straight trenches. A straight trench is a kill zone, allowing a single enemy gunner to dominate its entire length. Effective trenches must incorporate corners, turns, and short segments to break sightlines and compartmentalize the defense.
Designing Defenses with Foresight
Engineers must also consider the possibility of their position being captured. Poorly designed trenches can be easily turned against the defending team. The goal is to create positions that allow friendly forces to fire into trenches if they are occupied by attackers. A simple setup—a corner position overlooking a communication trench, reinforced with sandbags and a partial wall—creates a mutually supportive strongpoint that is difficult to assault directly. Defense is not a static act of holding a point; it is a dynamic process of anticipating the ebb and flow of the frontline and preparing for the inevitable counterattack.
Spawn Point Placement and Management
The most critical defensive task for an Engineer is spawn point management. A good defense always prepares a position for a rapid counterattack. When a point falls, attackers are momentarily disorganized. A nearby, safe spawn allows defenders to regroup and retake the objective before the enemy consolidates. Engineers should prioritize placing spawns in locations that are hidden from direct enemy fire, positioned slightly behind the objective for safety, and have enough physical space to allow multiple players to spawn without crowding. Since players can spawn within a few meters of the point, providing ample room prevents instant death upon arrival.
Officer Class: The Force Multiplier
The Officer is arguably the most influential class, serving multiple simultaneous roles that can dictate the pace of battle. Primarily, Officers act as mobile spawn points, capable of instantly reinforcing weak sectors of the line where static spawns are absent. Secondly, they provide crucial fire support through explosive abilities designed to break enemy strongpoints and disrupt formations.
Reconnaissance and Area Denial
Beyond spawning and firepower, Officers excel at reconnaissance. Spotting flares reveal enemy movements, providing the entire team with invaluable intelligence for coordinating attacks or shoring up defenses. Furthermore, Officers directly counter their opposite numbers. Deployable balloons can create a radius that blocks incoming enemy fire support, a vital capability on linear maps where a single objective may be under constant artillery bombardment. Ultimately, the Officer’s greatest contribution is coordination. A well-positioned Officer can transform a scattered group of individual players into a coherent, pushing front line, providing the strategic glue that wins matches.
Spawn Point Strategy: The Quiet Match-Decider
Spawn management is a subtle yet decisive mechanic. With a limit of three active spawn points per team on many maps, a poorly placed spawn can actively hinder a team’s strategic flexibility. Engineers have the ability to remove outdated spawns by spawning on them, selecting their hammer, switching to destroy mode, and dismantling the point. This action requires careful judgment, as a spawn that seems too far from the current front may become essential if the team is forced to retreat. The principle remains: a well-protected spawn in a decent location is superior to a perfectly positioned spawn in open ground that is easily destroyed. As a courtesy, Engineers should prioritize removing their own outdated spawns before affecting those placed by teammates.
Over The Top: WWI systematically rewards players who consider the broader battlefield over individual kill counts. Success is built on the pillars of intelligent positioning, prudent spawn management, and robust trench construction. These elements consistently outweigh raw mechanical skill. The players who pause to assess the map, reinforce faltering allies, and contribute to a unified team movement are the ones who quietly steer the outcome of the war. For those new to the trenches, focusing on these foundational principles is the surest path to becoming an effective soldier, as mastery of tactics naturally elevates every other aspect of play.