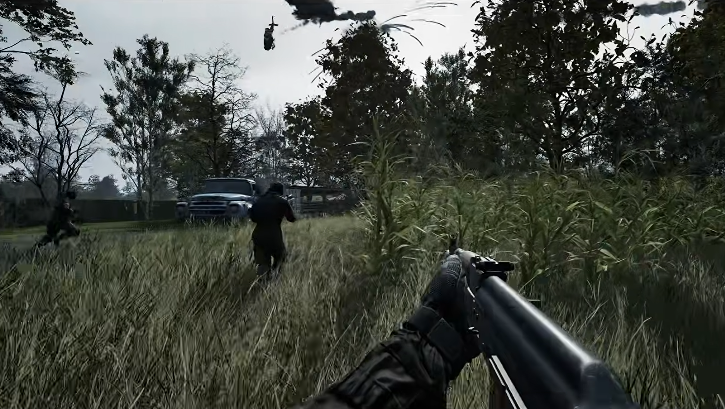
Community servers are the backbone of WARDOGS. Without them, you’re at the mercy of whatever matchmaking pool the devs decide to feed you, with whatever ping they decide is acceptable. Hosting your own server changes that equation completely. You control the map rotation, the player limits, the mods, and most importantly, you control who gets in.
The problem is that most guides online treat server setup like rocket science. They throw twenty different configuration files at you, mention port forwarding as an afterthought, and leave you drowning in technical jargon. It doesn’t need to be that complicated. This guide walks you through the exact process, step by step, with nothing extraneous and nothing skipped.
WARDOGS runs on a dedicated server binary that ships with the game files. You don’t need a separate purchase, a third-party hosting service, or a degree in network engineering. You need a reasonably modern PC, a stable internet connection, and about thirty minutes of your time.
What You Need Before You Start
Before touching anything, gather these three things:
- The WARDOGS dedicated server files — located in your Steam installation directory under
steamapps/common/WARDOGS/DedicatedServercodecodecodecode - A static or reserved local IP address for the machine hosting the server
- Open or forwarded ports — TCP 27015 and UDP 27016 are the defaults for WARDOGS, though you can change these in the config
That last point trips people up constantly. Port forwarding isn’t optional. If your router doesn’t forward the ports to your hosting machine, players from outside your local network will never connect. Period. You can have the perfect server config, the fastest hardware, and zero crashes, and nobody will be able to join.

Check your router’s manual or manufacturer website for the exact port forwarding procedure. The interface differs between brands, but the principle is identical: find the port forwarding section, create a rule for each port, and point them at your hosting machine’s local IP address.
Step 1: Install and Configure the Server Files
Navigate to your WARDOGS installation directory and locate the DedicatedServer folder. Inside, you’ll find the server executable and a configuration file named server.cfgcodecodecodecode. This file is your command center.
Open server.cfgcodecodecodecode with any text editor (Notepad works fine) and set the following minimum values:
“`
hostname “Your Server Name Here”
sv_password “”
rcon_password “YourRCONPassword”
sv_maxplayers 12
mapcycle “mp_compound mp_industrial mp_warfare”
“`

The sv_passwordcodecodecodecode field should stay empty unless you want a private server. The rcon_passwordcodecodecodecode gives you remote console access — set it to something strong. You’ll use it to kick players, change maps, and manage the server from the in-game console.
Save the file, then double-click the server executable. A command window opens and the server begins booting. You should see log output showing the server loading maps and initializing the game mode.
Expected outcome: The command window displays “Server started” or similar confirmation text. If you see error messages about missing files or invalid config values, double-check that every line in server.cfgcodecodecodecode is correctly formatted — missing quotes are the most common mistake.
Step 2: Verify Port Forwarding and Test Local Connection
With the server running, open WARDOGS on the same machine and press the tilde key (~codecodecodecode) to open the console. Type connect 127.0.0.1codecodecodecode and press Enter.
If you connect successfully, your server works locally. The game loads into the map, and you can see your server in the in-game server browser under the LAN tab. This test confirms the server binary works and the config is valid.
Now test from outside your network. Grab your public IP address (search “what is my IP” on any browser), then have a friend try connecting using connect YOUR_PUBLIC_IPcodecodecodecode in their console. If they connect, your port forwarding is correct.
Expected outcome: Local connection succeeds immediately. External connection succeeds only if port forwarding is configured correctly. If the external test fails, revisit your router settings. The most common issues are forwarding to the wrong local IP, using the wrong protocol (TCP vs UDP), or the Windows firewall blocking the server executable.
Step 3: Optimize Server Performance and Stability
A WARDOGS server with 12 players doesn’t need a monster rig, but it does need clean system resources. Close any background applications that hammer the CPU or network — torrent clients, streaming software, and browser tabs with video playback are the usual culprits.
Two settings in particular affect server stability:
Tickrate — the server’s update frequency. The default of 64 is fine for most community servers. Raising it to 128 improves hit registration but doubles the CPU and network load. Unless you’re running a competitive league server, leave it at 64.

Mapcycle length — longer map rotations mean fewer map-change events, and map changes are where WARDOGS servers crash most often. A cycle of 3-4 maps is a good balance between variety and stability.
Set the tickrate in server.cfgcodecodecodecode with sv_tickrate 64codecodecodecode. The mapcycle line you already configured handles rotation. Restart the server after any config change.
Expected outcome: The server runs for multiple consecutive hours without crashing, and players report consistent, playable ping.
Step 4: The Event Viewer Check That Saves You Hours
Here’s where most guides send you down a rabbit hole of trial and error. Skip that. Windows Event Viewer tells you exactly what crashed and why.
When the server crashes, open Event Viewer by searching for it in the Start menu. Navigate to Windows Logs > System. Look for red exclamation marks with timestamps matching your crash. The source entry will name the faulting process.
A specific issue affects WARDOGS servers running on Windows 10 and 11: a Windows security update from August 12th causes kernel-level conflicts with the game’s anti-cheat process. The crashing process is typically inputx64.syscodecodecodecode — an RGB lighting driver process that conflicts with kernel-level anti-cheat.
The fix is straightforward. Open Command Prompt as administrator and run these two commands:
“`
sc stop inputx64
sc config inputx64 start= disabled

“`
The first stops the process immediately. The second prevents it from auto-starting when you boot your PC. Restart the machine, then verify the process stays stopped with sc query inputx64codecodecodecode. If it says “STOPPED,” you’re clear.
Expected outcome: The server stops crashing entirely. This exact fix took a server that crashed every few minutes to 24+ hours of uninterrupted uptime.
Step 5: The Uninstall and Reinstall That Actually Fixes Corrupted Installations
If the Event Viewer check reveals a different faulting process, or the anti-cheat fix doesn’t resolve the crashes, the next step is drastic but effective: uninstall and reinstall the dedicated server files.
In Steam, right-click WARDOGS, select Manage > Uninstall. Wait for the uninstall to complete, then reinstall the game to a different drive if you have one available. Installing to a secondary SSD or HDD sidesteps any corrupted sectors or file system issues on the primary drive.
Expected outcome: After reinstallation, the server runs cleanly. This approach resolves file corruption that verification tools miss because the corruption is in the Windows file system itself, not the game files.
Server Configuration Comparison
| Setting | Default | Recommended | Impact |
|---|---|---|---|
| Tickrate | 64 | 64 | Higher values improve hit registration but double CPU/network load |
| Max Players | 8 | 12 | Above 12 requires significant CPU headroom on older processors |
| Mapcycle Length | 1 map | 3-4 maps | Shorter cycles reduce variety; longer cycles reduce crash risk |
| RCON Password | Empty | Strong password | Empty passwords leave your server open to admin takeover |
| Port Forwarding | Not configured | TCP 27015, UDP 27016 | Without this, external players cannot connect at all |
The One Counterargument: “Just Rent a Server”
The strongest argument against self-hosting is that third-party server rental services handle all of this for you. You pay a monthly fee, they provide the hardware, the port forwarding, the updates, and the uptime guarantee. For players who just want a server without the technical maintenance, that’s a legitimate option.
Here’s why it falls apart for WARDOGS specifically. The rental services that support WARDOGS are few, and the ones that exist charge premium rates for hardware that’s often older than the game itself. You’re paying for convenience and getting shared resources — a busy neighbor on the same physical machine tanks your server’s performance, and you have zero control over the host’s network configuration.
Self-hosting costs nothing beyond the game you already own. The setup takes thirty minutes once. The ongoing maintenance is checking for updates and restarting the server occasionally. For the price difference alone, self-hosting wins. For the control over your own community experience, it isn’t close.
When Self-Hosting Fails: The Edge Case Worth Knowing
Every setup guide needs an honest caveat. If your internet connection has asymmetric speeds — cable connections with 300 Mbps downloads but only 20 Mbps uploads — the upload bandwidth limits your player count far more than your CPU does. Each player consumes roughly 40-60 Kbps of upload bandwidth. A 12-player server needs about 720 Kbps of sustained upload, which sounds manageable until you factor in the game’s voice chat and the overhead of your own gameplay traffic.
The math gets tight on asymmetric connections, and tight math means packet loss, rubber-banding, and frustrated players. If your connection falls into this category, consider lowering your max players to 8 or upgrading your internet plan. The server will run, but the experience degrades long before the hardware does.
That’s the distinction that matters. Hardware problems you can fix with config changes and driver updates. Bandwidth problems require either accepting a smaller player count or upgrading your connection. Know which constraint you’re working against, and you’ll know exactly which fix applies.