Everyone says pick the hammer first. Everyone says max out every zone before fighting a resident. Everyone says crank assist mode sliders to 150% outgoing damage. That advice sounds right until it isn’t. Control Resonant punishes people who follow one-size-fits-all rules because its combat system rewards adaptability over sticking to a single strategy. Here are ten mistakes that keep players from pulling the trigger.
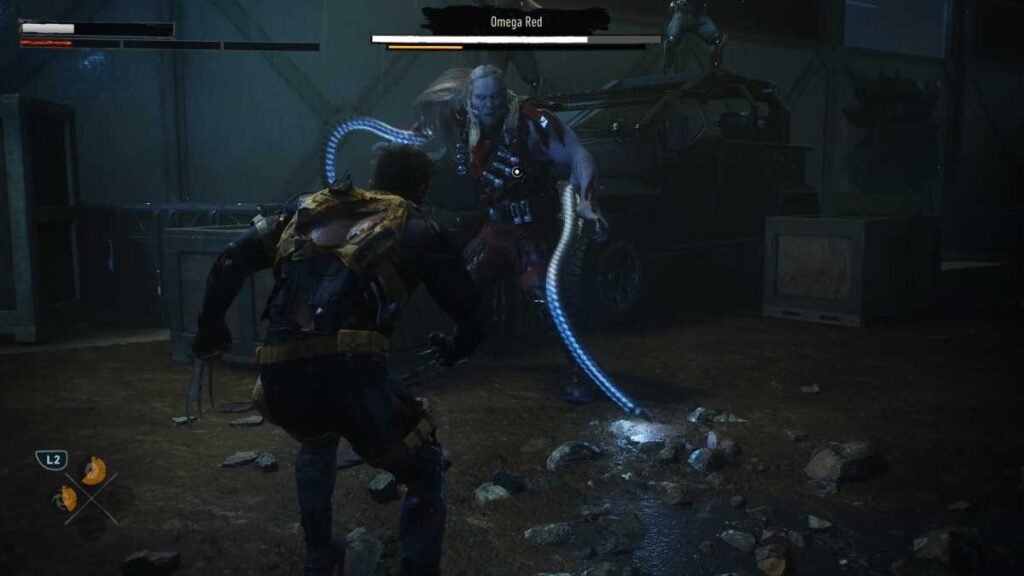
The biggest combat mistakes in Control Resonant come from treating the game like a traditional action title. There is no block or parry button. Regular attacks do pitiful damage unless you build around status effects or critical hits. And ignoring the fault meter means you miss the dominance buff that doubles your primary damage for eight full seconds. Learn the fault-dominance loop and stop mashing light attack without a plan.
If you spend ten hours clearing every world feat before facing your first resident, you'll be overleveled for content you're about to outscale anyway.
1. Rushing to the Hammer as Your Secondary
Common advice: grab the crush form (the hammer) the moment you can. It staggers enemies, breaks armor, smashes obstacles. True—but the hammer does blunt damage, which is terrible against mold enemies once their armor breaks. Against shielded enemies, sharp damage from the drill is far more effective. And against mold specifically, fire damage melts them while blunt does almost nothing.
The real mistake is treating crush as a universal answer. You want a secondary that complements your primary’s weakness. If you started with strike (fast, crit-focused), its raw damage handles most things but struggles against shields. Pair it with drill for sharp damage, not hammer. Save crush for when you know you’re fighting armored heavies later.
2. Maxing Out Zone Levels Before Beating Residents
“Complete all side activities and world feats before killing a resident” gets repeated constantly. The logic: zones reset after a resident dies, enemies get stronger, and you lose easy XP. But that advice misses one thing—killing a resident unlocks combat abilities that fundamentally change how you fight. The Factory Resident gives you fire attacks, without which mold enemies become a nightmare. The Park Resident unlocks summons that draw aggro and apply infected.
If you spend ten hours clearing every world feat before facing your first resident, you’ll be overleveled for content you’re about to outscale anyway. The smarter path: unlock the two traversal faults first (gravity shift in West Incursion Zone, reach in Evacuation Zone), then fight the Central resident to get fire. Now clear world feats with your new abilities. You gain more zone XP faster because fights take seconds instead of minutes.
3. Blowing Source on Vendor Materials Early
Vendors sell upgrade materials. Novices buy them. The mistake isn’t buying—it’s buying the wrong ones. Living shards cost 4,000 source each and unlock new weapon forms and combo finishers. Aberrant slivers and fragments drop from heavies and crates regularly. Every source you spend on common materials is source you don’t have for a living shard when it matters.
The Exchange Recents function inside the Gap solves this confusion. After unlocking a weapon form with a living shard, you can refund it for free as long as you haven’t left the Gap. Test every weapon in the training arena, swap freely, then leave once you’re sure. Most guides mention Exchange Recents but few emphasize that it works for combat abilities too. Test those three choices before committing.
4. Ignoring Assist Mode Sliders Entirely
Purists insist assist mode is for casuals. The game itself warns you not to use it. But here’s what nobody says: the sliders work in both directions. You can make the game harder too. Setting outgoing damage to 150% and incoming damage to 200% creates a glass-cannon experience that forces perfect play. Conversely, setting outgoing damage to 100% and outgoing filter to 50% makes tanky encounters less tedious without removing challenge entirely.
The hidden variable is the outgoing filter slider, which affects status effect buildup (burn, infected, astralized). Crank that up and your combo finishers apply effects almost instantly. That’s not “easy mode”—that’s a different build constraint. Use assist mode to tune gameplay to your preference, not as a crutch. The game never tells you the filter slider exists, and ignoring it means you’re playing a version of Combat Resonant that nobody tested.
5. Sticking to One Combo Finisher Forever
Most players pick concussive beatdown for the huge falter damage and never swap. It’s good—but not against everything. Split pivot applies weakened and burning status effects. Wide edge knocks enemies back, creating space when you’re swarmed. Spin edge hits three times and builds power faster. Uppercut surge launches enemies airborne, letting you chain backstab damage with the skilled backstab talent (+50% melee and falter damage from behind).
The mistake is treating combo finishers as a permanent choice. You can swap them mid-combat by pausing, going to loadout, and selecting a different finisher. The only restriction: don’t have the weapon actively attacking. Pause between combos, switch to split pivot against a shielded enemy, then back to beatdown for the armored guy. That two-second pause saves you ten seconds of ineffective whaling.
6. Sleeping on the “Lifted” Status
Lifted isn’t just for show. When an enemy has the lifted status (orange marker above health bar), hitting them restores power. Power is the resource you use for combat abilities. More power means more ignites, more summons, more shield bashes. The common tip is to build falter and go for executions. But lifting enemies and then chaining combos into their back fills your power bar twice as fast.
The strike primary weapon with its first upgrade builds power on successive hits. Combine it with the uppercut surge combo finisher (which applies lifted), and you can spam combat abilities almost nonstop. Most guides treat lifted as a damage multiplier. It’s actually a power management tool. Managing power is what separates players who run out of steam mid-fight from those who chain inferno, growth, and ground slam in a loop.
7. Forgetting That Perfect Dodge Resets Your Combo
Learning to perfect dodge is crucial. The slow-mo window lets you counterattack with bonus damage. But there’s a trap: performing a dodge attack (pressing attack during the dodge) resets your combo string. If you were two hits away from your combo finisher, that perfect dodge just cost you the damage spike.
The fix is a 0.25-second delay after the dodge before pressing attack. That small pause continues your combo where it left off instead of triggering the dodge attack. This matters most when you have a fully upgraded split pivot or wide edge waiting at the end of your string. Dodging into a heavy while preserving your combo finisher turns a defensive reaction into an offensive play. Most combat advice skips the timing detail.
8. Hoarding Reset Items for “Later”
Reset items let you respec abilities, talents, and weapon upgrades. You get them from defeating residents and from vending machines. Players hoard them because they’re finite. But here’s the reality: you can acquire at least 14 across a normal playthrough, possibly double that. You will never need more than a handful.
The real waste is refusing to respec when you hit a wall. The Park Resident boss fight becomes trivial if you swap to the Molding Bar artifact (sold by the park vendor for 1,000 source) which grants immunity to infected at the cost of 50% health. The West Incursion Zone resident demands close-quarters combat where volatile anomaly’s turret draws aggro. If you already invested in barrage or shield, a single reset item solves the problem. Use them. They respawn.
9. Only Upgrading Your Favorite Weapon
Aberrant strength is your damage multiplier. Each weapon form upgrade increases it. The common advice says “focus on your primary.” That’s correct for the first few upgrades, but the real gains come from unlocking every form and combo finisher for the first time. Each new form gives +5 aberrant strength. Six combo finishers give +30 total. Those points apply to all weapons, not just the one you upgraded.
The materials to upgrade secondary or tertiary forms often overlap with what you need for your main. You’ll hit walls where a node costs aberrant remnants you don’t have. Meanwhile, unlocking the drill for the first time costs one living shard and zero remnants. That’s +5 strength—equivalent to five smaller upgrades. Spend living shards on unlocking, not on pushing deeper into one tree until you’ve opened everything.
10. Treating Every Zone as Equal
New zones scale with your world level. The West Incursion Zone starts at a higher base level than Central. The Park is a nightmare even at the same level because of constant infected buildup. The Evacuation Zone has shielded enemies that laugh at raw damage. The common mistake is assuming that because you reached a zone, you’re supposed to fight there.
Check your build power (loadout -> stats and effects, press Y/Triangle). If enemies display a skull where their level should be, you are underpowered. That skull means the enemy is significantly above your effective level. The correct response is not to “git gud”—it’s to backtrack to a zone where enemies match your level, complete world feats, upgrade your aberrant forms, and collect health/power upgrades. Every vendor has a health upgrade right next to it. Each zone has at least one power upgrade in a test facility. Find those before forcing a fight.
You can also use zone leveling to your advantage. Leveling a zone unlocks bonuses like marking large resource crates on the map or increased vendor stock. That makes farming materials for upgrades faster. Rush the two traversal faults first, then focus on one zone at a time instead of spreading yourself thin across five zones at once.
The one scenario where general advice fails completely is when you’re speedrunning for a specific ability. If you need the fire ability to handle mold, ignore everything else and kill the Factory Resident first. The zone resets, enemies get tougher, but you now have inferno. Then you can farm world feats more efficiently because you aren’t wasting ten seconds per mold enemy. Know when to break the rules.